In Part 1 I covered the begining of my smart home journey. In today’s Part 2 I will walk through how how I iteratively built my proximity-based porch lights.
With my Raspberry Pi up and running with Hass.io I had three tasks ahead of me to reach porch light nirvana, if such a place were to exist.
- Tell Home Assistant where I am
- Tell the Home Assistant where is Home
- Set up the automation for turning the lights on when I get Home
This was considerably more difficult than setting up the bulbs in Part 1, however, there is great documention out there which I will link to throughout my walkthrough.
1. Tell Home Assistant where I am
Initially, I triggered “Home” when I connected to the wifi. This was an easy bit of code:
	device_tracker:
  	  - platform: ping
	    hosts:
 	     me: !secret phone_ip
Throughout my articles on home assistant you will see the !secret
notation. This utilizes the secrets.yaml file to abstract away sensitive details and still [post my .yaml files publicly](https://github.com/pattertj/Home-Assistant-Configuration/blob/master/configuration.yaml). It also make administration and configuration simpler through reuse.
However, I ended up with phantom lights as the wifi would connect and drop when my phone slept. Additionally the lights often didn’t come on until I was in my porch for a minute or so, usually after I needed them to be on. I knew I needed something more robust and more accurate. Searching the forums led me to OwnTracks.
OwnTracks is an open-source application that allows people to track their location on iOS or Android phones and publish it to a broker. It uses the open MQTT protocol for this communication which is very popular in the Home Assistant community and will the subject of future blog posts. To set up OwnTracks, I started with finding an MQTT Broker.
a. Setup an MQTT Broker
Home Assistant contains an embedded MQTT broker. Home Assistant is capable of hosting an MQTT Server, however at the time I chose to implement CloudMQTT. It was an easy and free setup with the easy steps in the Home Assistant documentation. Make sure to setup two users, one for home assistant and one for your phone.
It is on my roadmap to convert over to the Raspberry Pi Broker in the future as it is one of only two pieces of my Smart Home running outside of my network.
Once the Broker is setup, make sure to grab the Server amd Port as well as the Username and Password for your Home Assistant MQTT user. This is different from your Cloud MQTT login.
b. Setup the MQTT Component in Home Assistant
Since OwnTracks requires MQTT to be setup, we have a few lines to add before we configure OwnTracks. With the pertinant details from CloudMQTT, adding in the requisite configuration.yaml code is pretty straight forward.
mqtt:
  broker: !secret CLOUDMQTT_SERVER
  port: !secret CLOUDMQTT_PORT
  username: !secret CLOUDMQTT_USER
  password: !secret CLOUDMQTT_PASSWORD
Make sure to store the sensitve details in your secrets.yaml file!
c. Setup OwnTracks in Home Assistant
Telling Home Assistant about OwnTrack through the OwnTracks Component is also quick.
device_tracker:
  - platform: owntracks
There are a number of settings that are configurable for OwnTracks, however this is the minimum requirements and was enough for my needs.
d. Setup OwnTracks on my Phone
Finally, I needed to setup OwnTracks on my phone. OwnTracks.org provides links to both the iOS and Android app’s. Once installed, there are a few pieces of information to configure.
Using the same Server and Port as before, configure your phone for the same host settings:

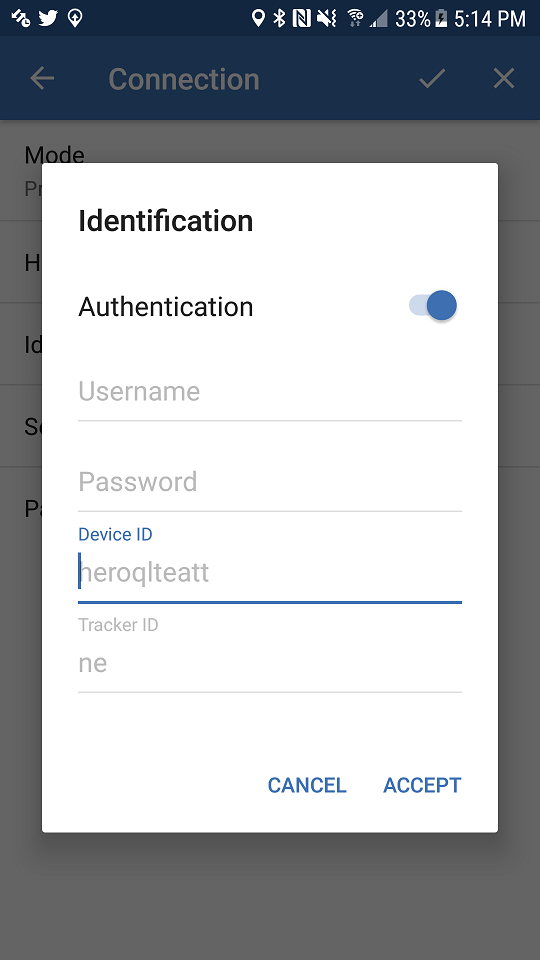
Within “Authentication”, set up the username and password matching your phone’s user account from CloudMQTT. The Device ID and Tracker ID can be anything you want.

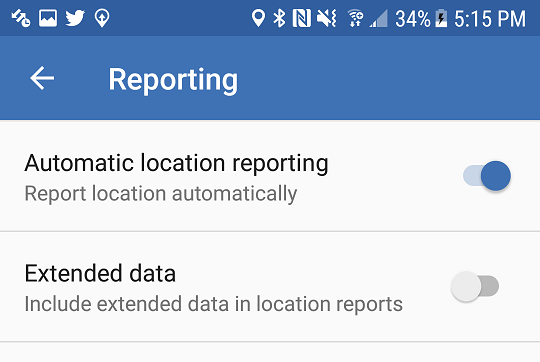
Within Reporting, make sure “Automatic Location Reporting” is enabled.

At this point, your phone should be setup to start broadcasting your location to Cloud MQTT. You can validate this from your CloudMQTT log’s where you should see traffic flowing in.
2. Tell the Home Assistant where is Home
This was an easy addition to Home Assistant, with just a few lines of code in my configuration.yaml file:
    zone:
      - name: Home
        latitude: !secret home_lat
        longitude: !secret home_long
        radius: !secret zone_radius
        icon: mdi:home
The Latitute and Longitude are the location of my home pulled from a quick address lookup on Google Maps. The Radius is in meters and allows me to account for variations in GPS accuracy on my phone. Additionally, it allows me to trigger the lights as I pull up to the house instead of having to be directly inside.
In addition to setting up Home Assistant, You will want to set up a region in the Owntracks app as well. You should name this the same as your Home Assistant Zone, and then make sure to turn on the share option for the region in the OwnTracks app.
At this point, if everything is working, you can restart your Home Assistant and within the dev-states, you should see your device and it’s location.
3. Set up the automation for turning the lights on when I get Home
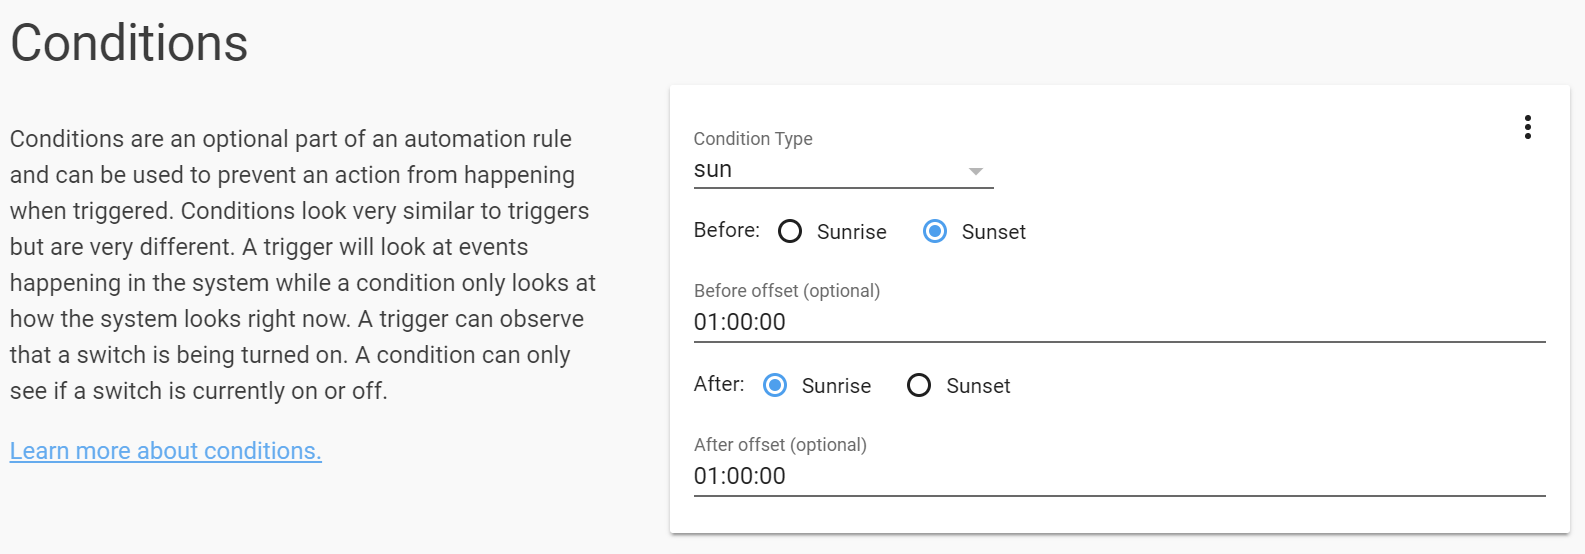
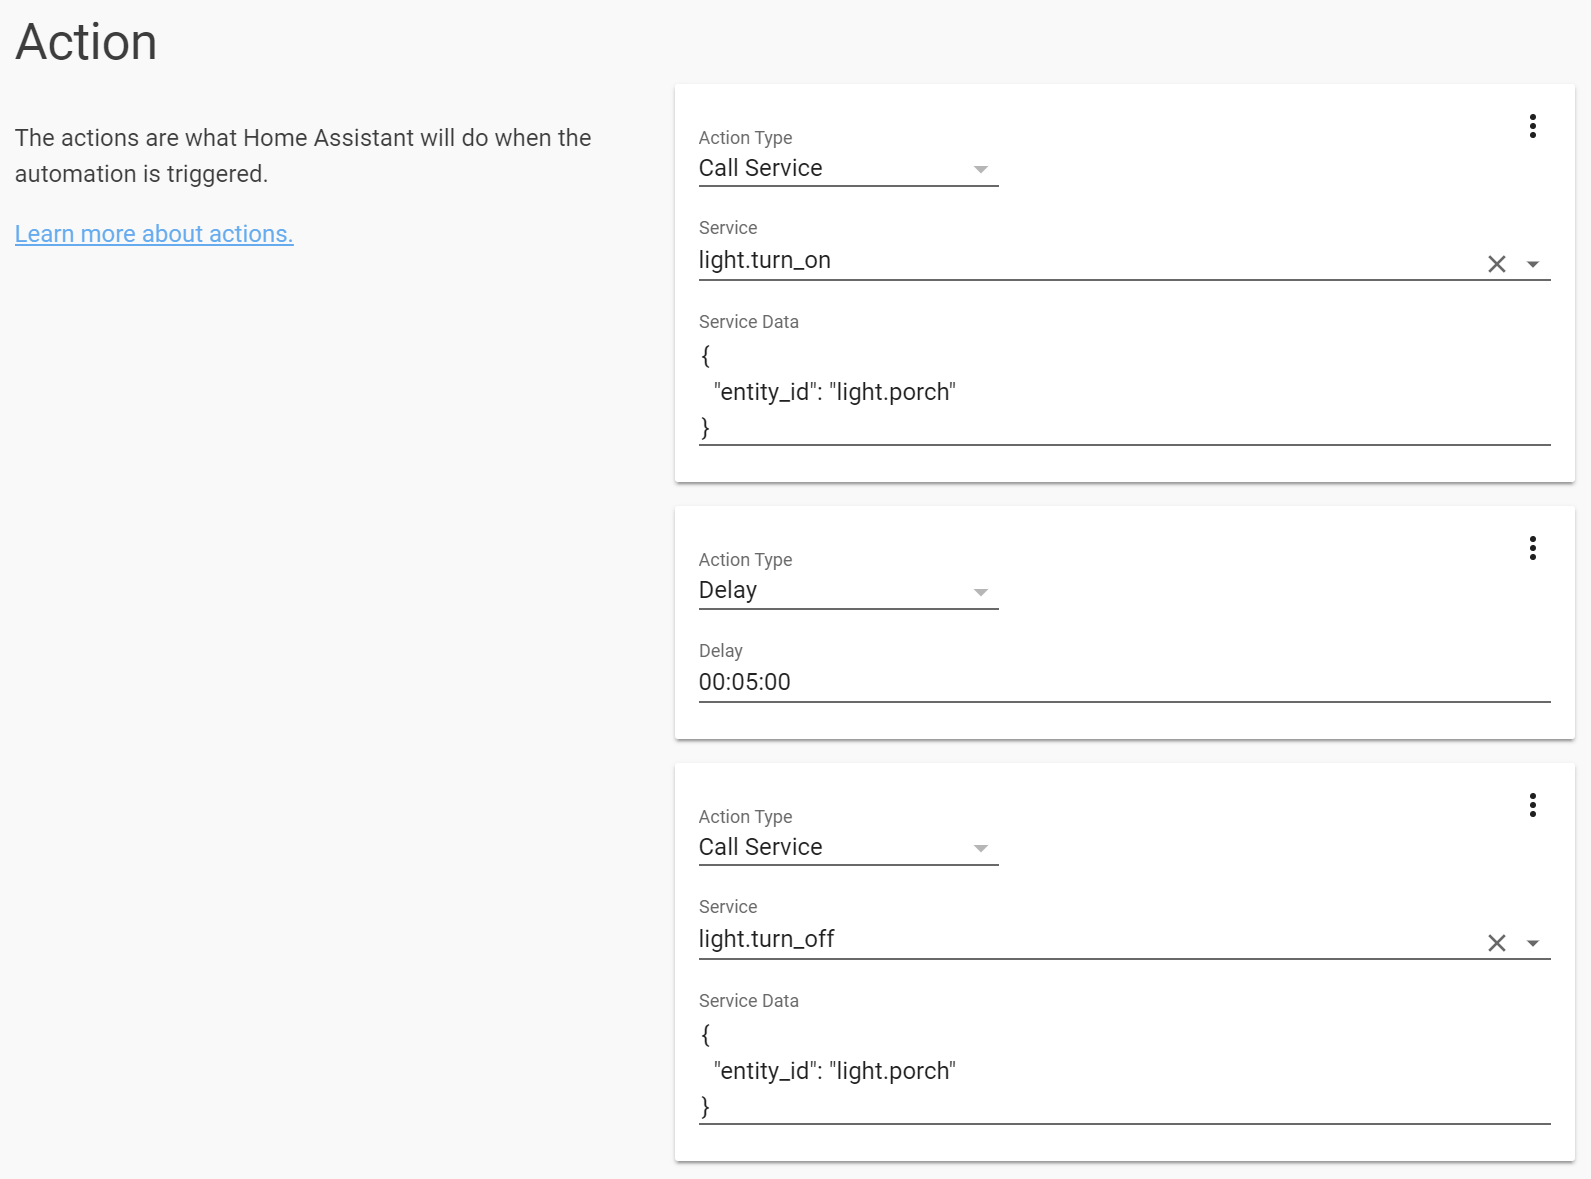
The final step is building the Automation. The built-in tool to Home Assistant makes this a breeze. Home Assistant uses simple Trigger, Condition, Action logic for building Automations.


Wrap-Up
Overall, this project took me a full weekend with trial-and-error to get running. Tackling the work incrementally and iterating on certain portions allowed me to deliver small wins and keep up the momentum on the project.
Through the process I learned a ton about how Home Assistant works and how to configure it. I have built other automations since this one, but this is my far my most frquently used. The conveinance factor is high and it has really sold me on the power of what is possible in home assistant.
I’m currently working on a Home Assistant based security system utilizing Z-Wave devices that I’ll cover in a future post!
